Replacing a toner cartridge in a LaserJet printer is a task that many office workers and home users frequently encounter. Doing the job correctly ensures that your printer continues to produce high-quality prints and operates without any hitches. This article offers a comprehensive step-by-step guide on how to replace a toner cartridge in a LaserJet printer.
Understanding the Basics
Before diving into the replacement process, it’s crucial to understand the basic components and workings of your LaserJet printer. Here’s a quick rundown of the essential elements:
- Toner Cartridge: Contains the toner powder used to print texts and images.
- Drum Unit: Transfers the toner powder to the paper.
- Imaging Drum: An electrically charged drum that helps in creating a print image.
- Fuser Unit: Fuses the toner powder to the paper, creating a durable print.
The following table provides a quick glance at some of the common LaserJet printer models and their compatible toner cartridges:
| LaserJet Printer Model | Compatible Toner Cartridge |
|---|---|
| HP LaserJet Pro MFP M130nw | HP 17A (CF217A) |
| HP LaserJet Pro M15w | HP 48A (CF248A) |
| HP LaserJet Pro MFP M428fdw | HP 58A (CF258A) |
| HP Color LaserJet Pro MFP M281fdw | HP 202A (CF500A, CF501A, CF502A, CF503A) |
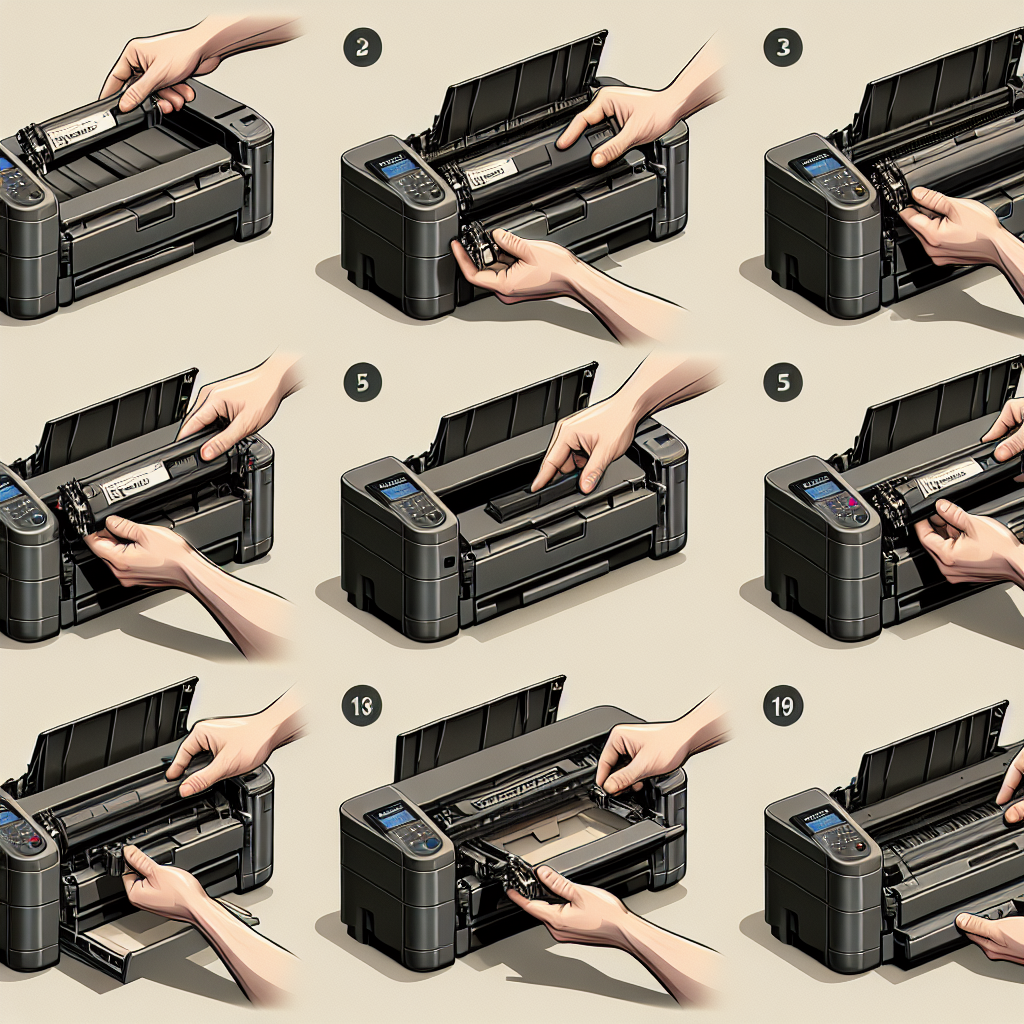
Step-by-Step Guide to Replacing a Toner Cartridge
Step 1: Prepare the Printer
Before you start, make sure your printer is turned on. Open the front cover or the toner access panel. This location can vary depending on the model, but it’s usually located on the front or top of the printer.
Step 2: Remove the Old Toner Cartridge
Gently pull out the toner cartridge. Most cartridges have a handle or an easy-to-grasp area. Pull the cartridge out slowly to avoid spilling any toner powder.
Step 3: Unpack the New Toner Cartridge
Remove the new toner cartridge from its packaging. Be cautious as toner powder can sometimes leak. Most new cartridges come with a protective seal that you need to remove. Follow the instructions provided with the cartridge to remove this seal correctly.
Step 4: Insert the New Cartridge
Hold the new cartridge by its handle and slide it into the printer. Ensure it clicks into place securely. Some models might have a specific track or guide to make sure the cartridge is aligned correctly.
Step 5: Close the Printer
Close the front cover or toner access panel. Make sure it’s securely shut. If the cover isn’t closed properly, the printer may not operate.
Step 6: Test the Printer
Once the new toner cartridge is installed, it’s time to test the printer. Print a test page to ensure everything is working smoothly. If the prints are clear and accurate, then you’ve successfully replaced the toner cartridge.
Troubleshooting Common Issues
Cartridge Not Recognized
If your printer doesn’t recognize the new cartridge, try removing it and reinstalling it. Ensure it’s properly seated and that all seals have been removed.
Print Quality Problems
If you notice any print quality issues, like streaks or smudges, you may need to run a cleaning cycle on your printer. Refer to your printer’s manual for instructions on how to do this.
Maintenance Tips
To extend the life of your printer and ensure the best print quality, follow these maintenance tips:
- Regular Cleaning: Clean the printer regularly to avoid dust buildup, which can affect print quality.
- Use Genuine Cartridges: Always use genuine toner cartridges recommended by the manufacturer to avoid compatibility issues.
- Store Properly: Store toner cartridges in a cool, dry place to maintain their efficacy over time.
- Update Firmware: Keep your printer’s firmware updated to ensure optimal performance.
By following this guide, you can easily replace a toner cartridge in your LaserJet printer, ensuring it runs efficiently and produces high-quality prints. Regular maintenance and using the correct toner cartridges can prolong the life of your printer and keep it in top working condition.